Initializing
This guide explains how to initialize a dedicated server using SteamCore for seamless integration with Steam's online features. For a visual walkthrough, watch the Video Tutorial.
Prerequisites
- A configured DefaultEngine.ini file for your dedicated server.
- SteamCore PRO installed and set up in your Unreal Engine project.
- Access to your Steam App ID for Steam integration.
- For Steam functionality, ensure the appropriate steamclient libraries are correctly placed on the server.
Initializing with SteamCore Online Subsystem (OSS)
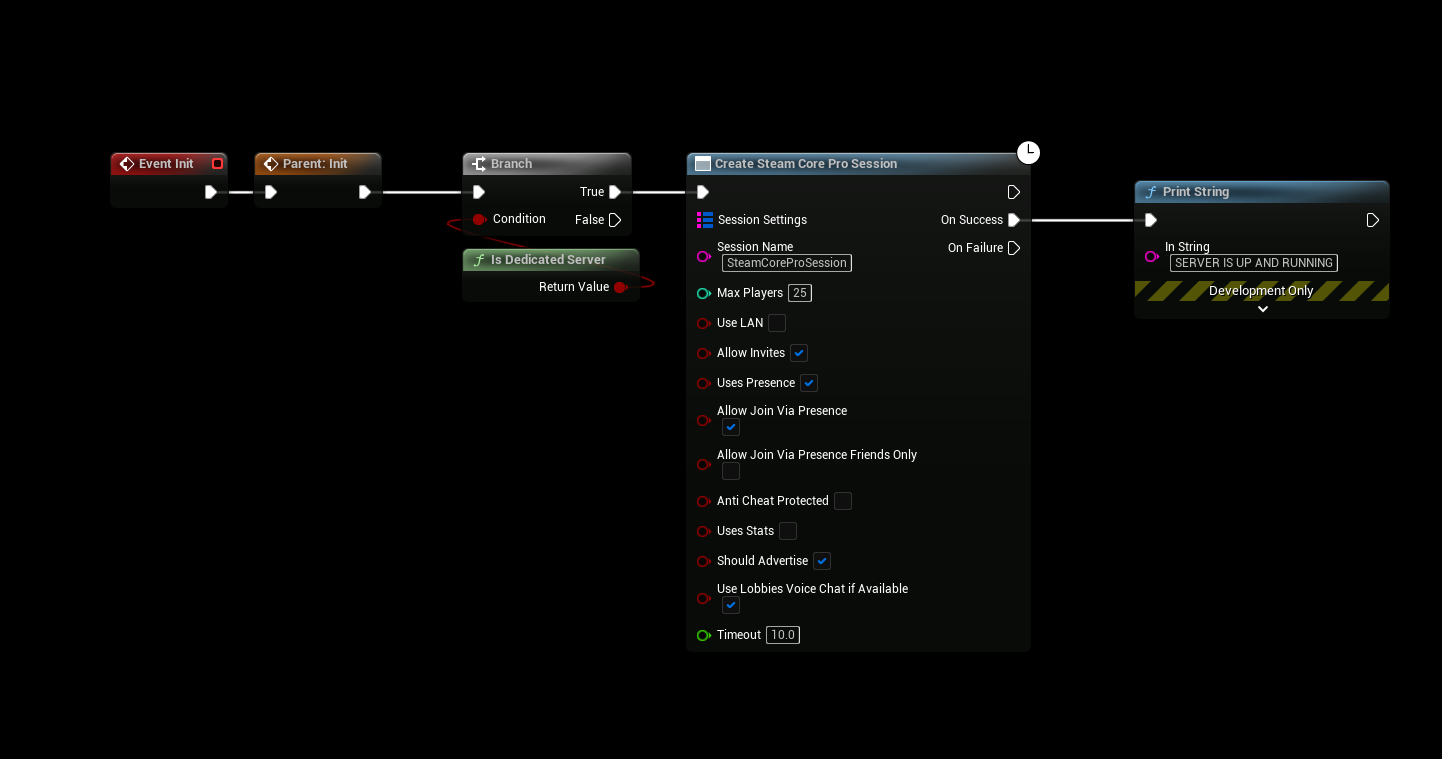
The SteamCore Online Subsystem (OSS) simplifies dedicated server initialization. After configuring your server settings in DefaultEngine.ini, you can use the Create SteamCore PRO Session node to automatically initialize the server.
Steps
- Ensure your
DefaultEngine.inifile is properly configured for the dedicated server. - In your server-side logic (e.g., Game Mode or Game Instance Blueprint), add the Create SteamCore PRO Session node.
- Execute the node to initialize the server, which will handle Steam integration automatically.
Adding Server Attributes
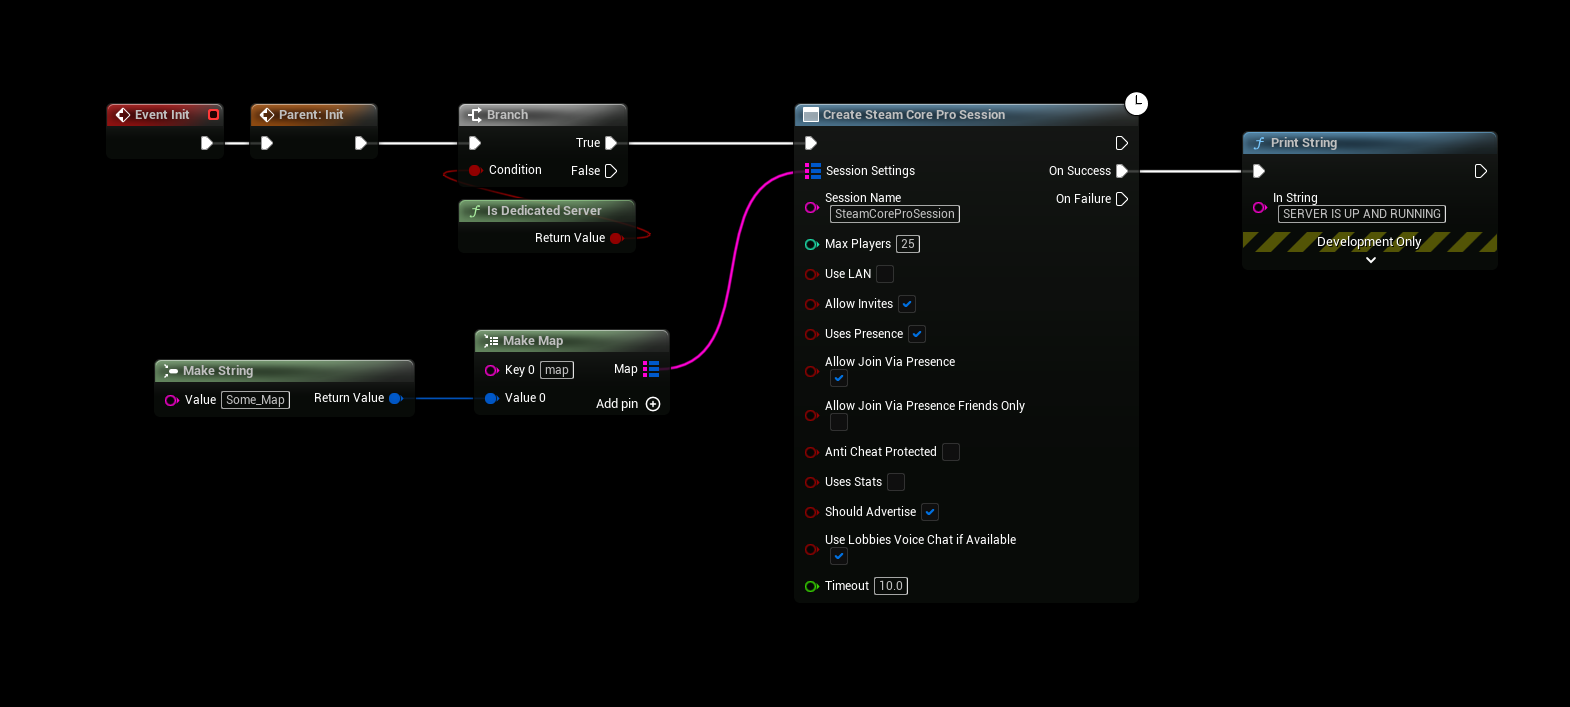
You can include custom attributes (e.g., map name, game mode) to advertise specific server details to players.
Steps
- Add the Set Session Attributes node after the Create SteamCore PRO Session node.
- Specify key-value pairs for attributes like
MapName,GameMode, or other custom metadata. - These attributes will be visible to players browsing for servers on Steam.
Enabling Steam Functionality
To use Steam features (e.g., matchmaking, server visibility), you must include the steamclient libraries in your server’s directory. Below are instructions for Windows and Linux servers.
Windows Server
-
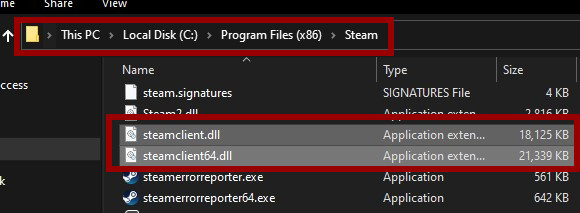
Locate the Steamclient Libraries:
- Find the
steamclient.dlland related files in your Steam SDK or Steam installation directory.
- Find the
-
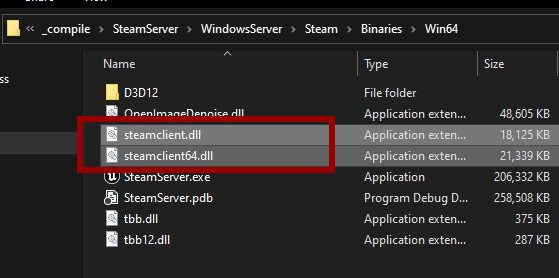
Copy the Libraries:
- Copy the
steamclient.dlland associated files to the same directory as your server’s executable (e.g.,YourServer/Binaries/Win64/).
- Copy the
Linux Server
-
Locate the steamclient.so File:
- Use the
findcommand to locate thesteamclient.sofile in your Steam installation or SDK.
hulken@gameserver:~$ find . -name "*steamclient.so*"
./.local/share/Steam/steamcmd/linux32/steamclient.so
./.local/share/Steam/steamcmd/linux64/steamclient.so
./.steam/sdk64/steamclient.so - Use the
-
Copy the steamclient.so File:
- Copy the appropriate
steamclient.sofile (e.g., 64-bit version) to your server’s executable directory.
cp /home/hulken/.local/share/Steam/steamcmd/linux64/steamclient.so /home/hulken/LinuxServer/STEAM/Binaries/Linux/ - Copy the appropriate
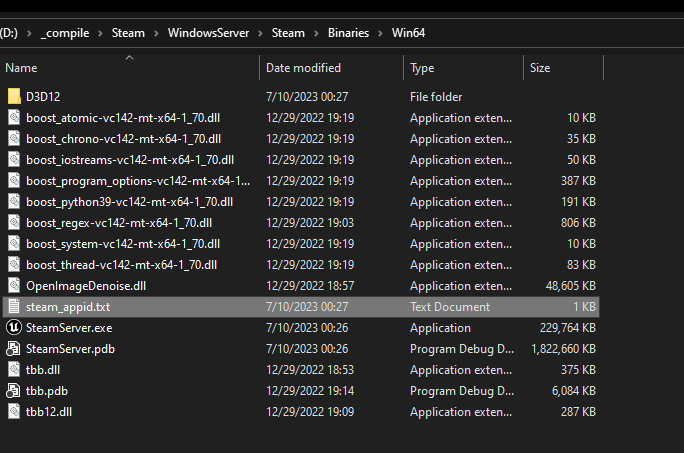
Creating steam_appid.txt
In some cases, the server may lack permissions to automatically create the steam_appid.txt file. You can create it manually to ensure proper Steam integration.
Windows Example
-
Create a file named
steam_appid.txtin the root directory of your server (e.g.,YourServer/Binaries/Win64/). -
Add your Steam App ID as the only content in the file.
Linux Example
-
Create the
steam_appid.txtfile in the server’s executable directory and add your Steam App ID.hulken@gameserver:~/LinuxServer$ echo "480" > Steam/Binaries/Linux/steam_appid.txt
Initializing Without OSS
If you prefer not to use the SteamCore Online Subsystem, you can manually initialize the server with Steam functionality. This requires setting up specific nodes to advertise the server on Steam. Refer to the Steamworks Documentation for a complete list of required nodes.
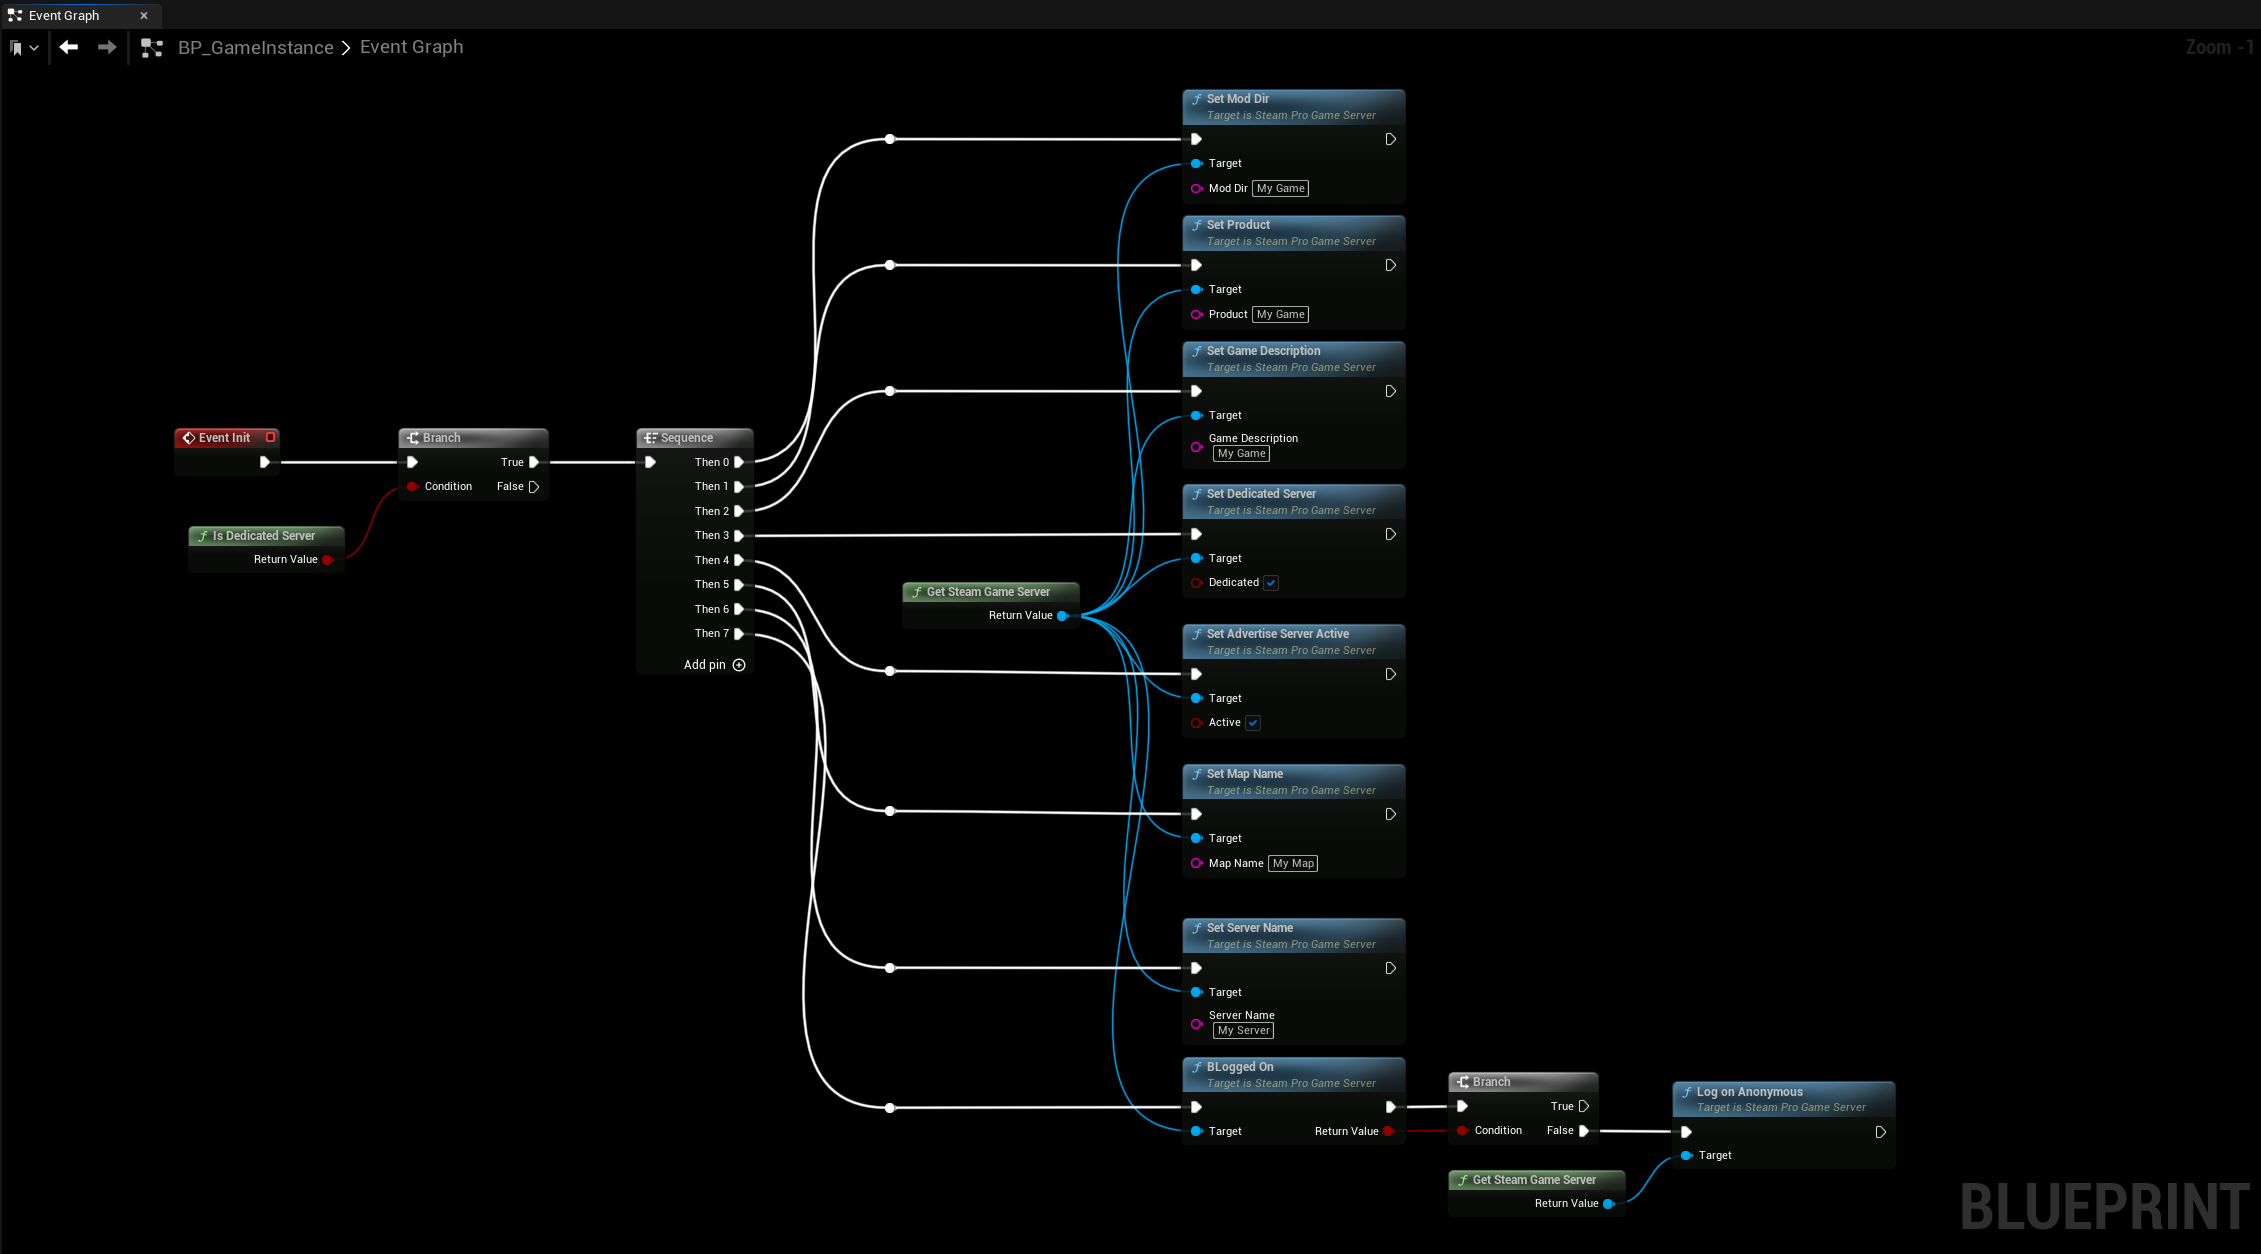
Steps
- Add nodes such as Initialize Steam Server, Set Server Data, and Advertise Server to your server logic.
- Configure each node with the necessary parameters (e.g., server name, port, Steam App ID).
- Ensure the
steamclientlibraries andsteam_appid.txtare correctly set up, as described above.
Notes
- Always verify that your Steam App ID is correct to avoid authentication issues.
- Test server initialization in a development environment to ensure Steam integration works as expected.
- For manual initialization, carefully review the Steamworks API documentation to include all required nodes and settings.
- Ensure the server has appropriate permissions to access the
steamclientlibraries and create or read thesteam_appid.txtfile.