Connecting to a Dedicated Server
This guide explains how to connect to a dedicated server in Unreal Engine using SteamCore PRO. The method depends on your DefaultEngine.ini configuration and the networking driver in use. Three approaches are detailed below: SteamCore PRO Sessions, SteamCoreSockets, and IpNetDriver. For a visual walkthrough, see the Video Tutorial.
Prerequisites
- SteamCore PRO installed in your Unreal Engine project (for Steam-based methods).
- Properly configured
DefaultEngine.inifor your chosen networking driver. - Access to the server’s address (Steam P2P address or IP) and port.
- For production, implement a server browser to allow players to select from available servers.
Option 1: Using SteamCore PRO Sessions
This method uses the SteamCore Online Subsystem (OSS) with the SteamCoreSockets NetDriver to find and join sessions. It’s ideal for Steam-integrated multiplayer games.
Configuration
- Configure the SteamCoreSockets NetDriver as described in the SteamCoreSockets Configuration Guide.
Steps
- Add the Find SteamCore PRO Sessions node to your game logic (e.g., in a Game Instance or Menu Blueprint) to search for available servers.
- Use the Join Session node to connect to a selected session.
- Handle the session results to allow players to choose a server (e.g., via a server browser UI).
Example
The following Blueprint demonstrates connecting to the first available session. This is for demonstration only; in production, use a proper server list UI to let players select a server.
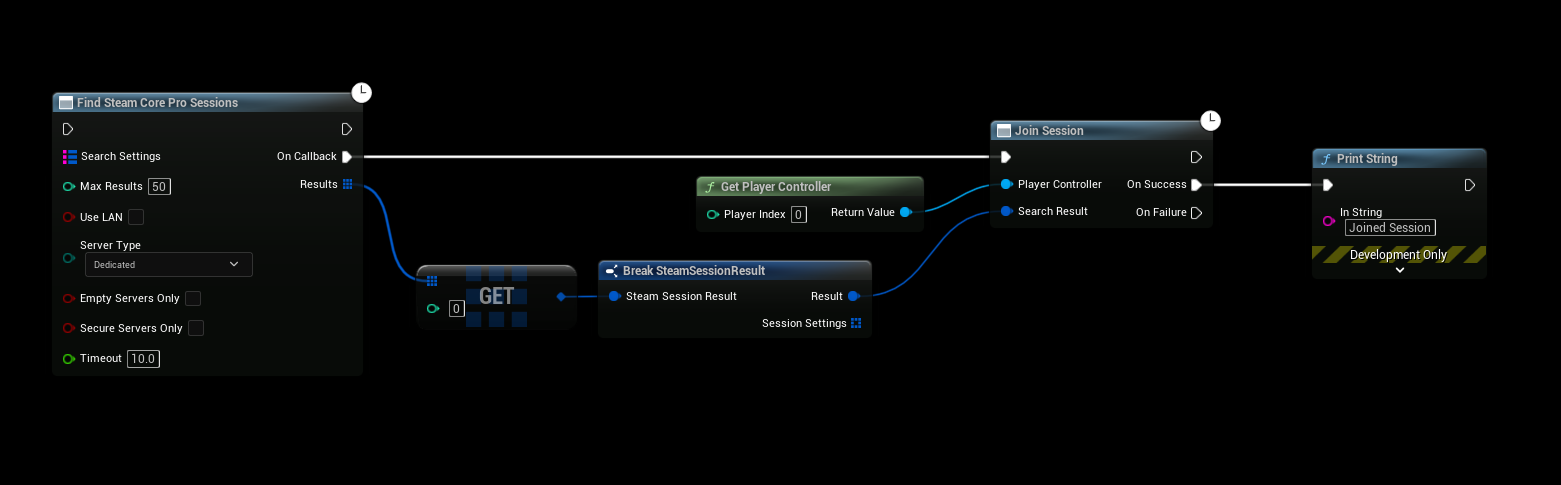
This example automatically joins the first session found for simplicity. In production, implement a server browser to display all available sessions and allow players to choose. Refer to the Blueprint example project for a complete implementation.
Option 2: Using SteamCoreSockets (Bypassing Online Subsystem)
This method connects directly to a server using the SteamCoreSockets NetDriver without relying on the Steam Online Subsystem. It requires the server’s Steam P2P address and port.
Configuration
- Set up the SteamCoreSockets NetDriver as outlined in the SteamCoreSockets Configuration Guide.
Steps
-
Use the Execute Console Command node in your game logic.
-
Enter the console command in the format:
open steam.P2PAddr:Port- Replace
P2PAddrwith the server’s Steam P2P address. - Replace
Portwith the server’s port number.
- Replace
Example
The following Blueprint shows how to execute the console command to connect to a server using a Steam P2P address.
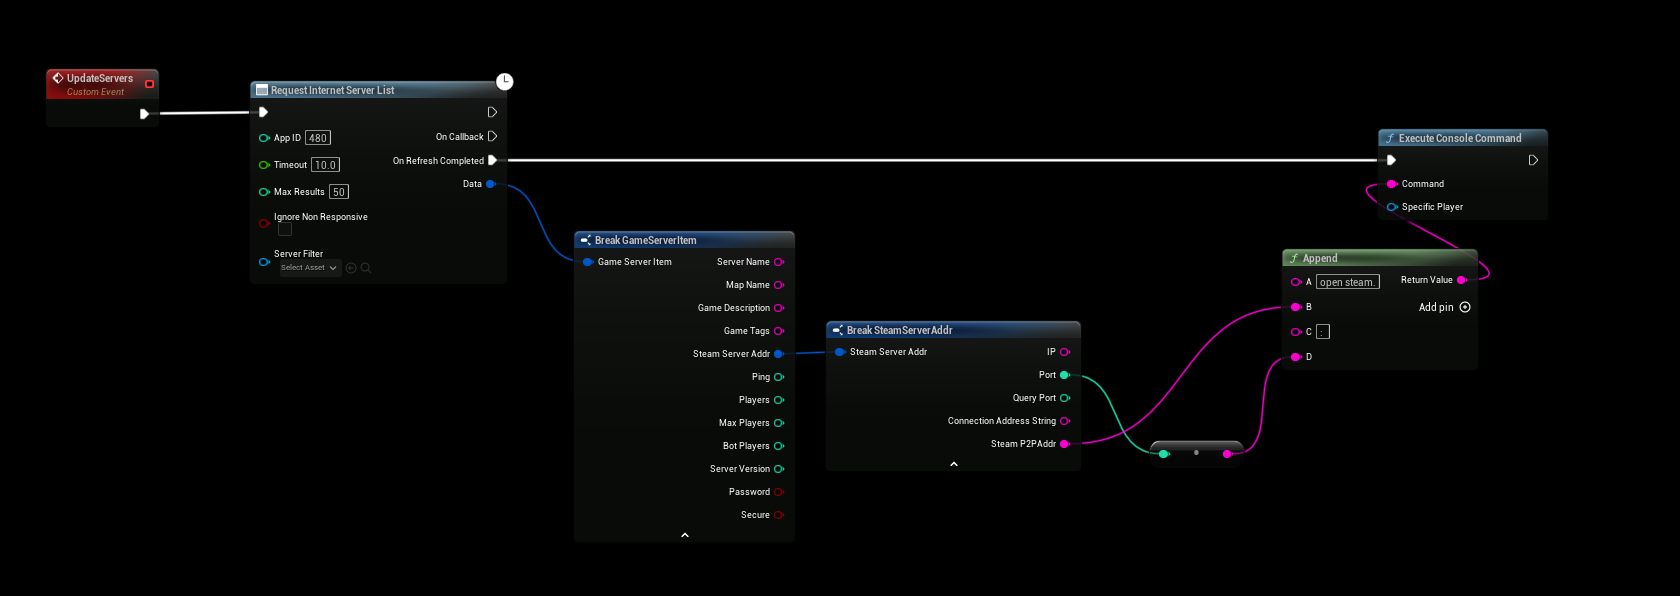
This example is a basic demonstration and connects to a hardcoded server address. For production, implement a dynamic server list or user input for the address and port.
Option 3: Using IpNetDriver (Bypassing Online Subsystem)
This method connects to a server using a standard IP address and port, without requiring Steam integration. It’s suitable for non-Steam servers or custom networking setups.
Configuration
- Configure the IpNetDriver as described in the IpNetDriver Setup Guide.
Steps
-
Use the Execute Console Command node in your game logic.
-
Enter the console command in the format:
open <IP>:<Port>- Replace
<IP>with the server’s IP address. - Replace
<Port>with the server’s port number.
- Replace
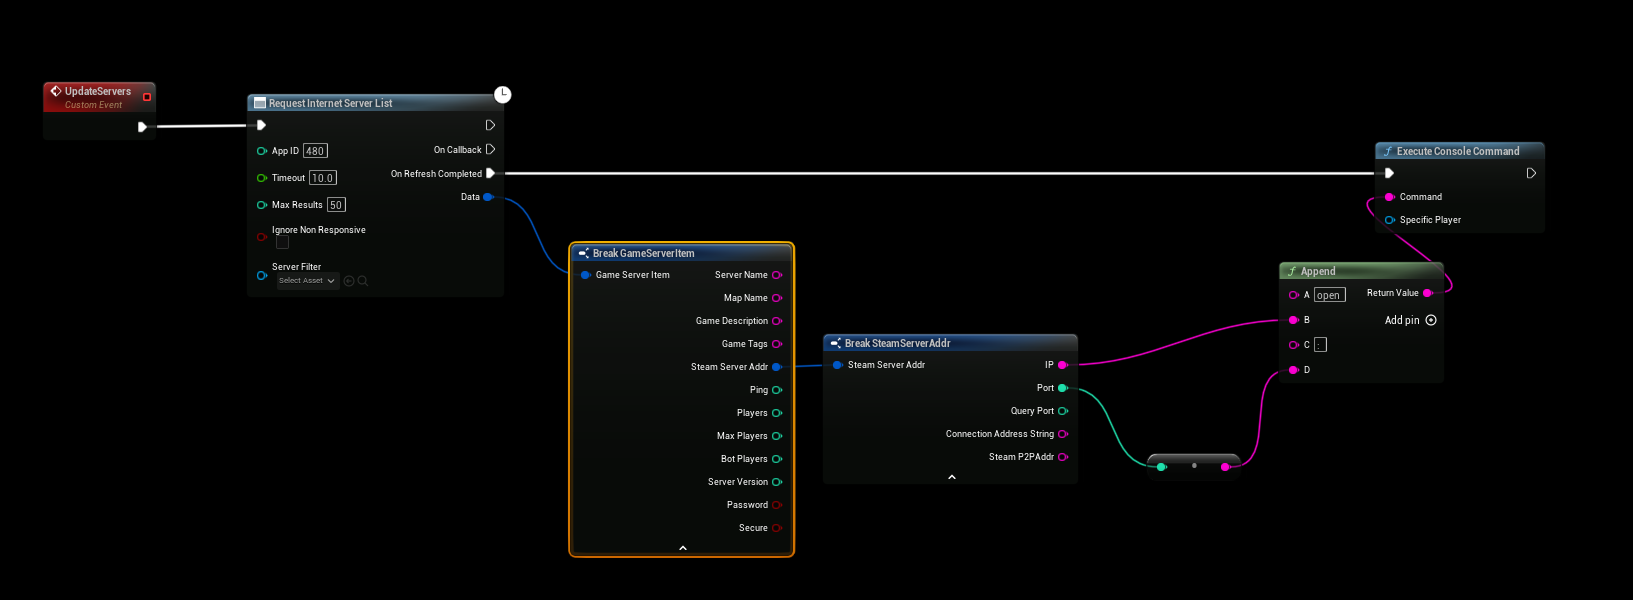
Example
The following Blueprint demonstrates connecting to a server using an IP address and port.
Notes
- Server Browser: For a polished player experience, implement a server browser UI to list available servers and allow players to select one, rather than hardcoding or automatically joining the first session.
- Testing: Test connections in a development environment to ensure the server address, port, and networking driver are correctly configured.
- SteamCoreSockets vs. IpNetDriver: Use SteamCoreSockets for Steam-integrated servers and IpNetDriver for non-Steam or LAN-based servers.
- Error Handling: Add logic to handle connection failures, such as invalid addresses or unavailable servers, to improve user experience.