Installing the Plugin
You can follow along with our Getting Started Video Tutorial for a visual walkthrough.
Installation Overview
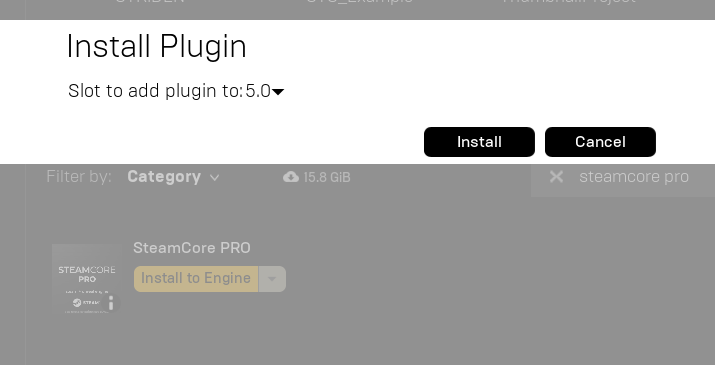
The plugin can only be installed via the Epic Games Launcher.
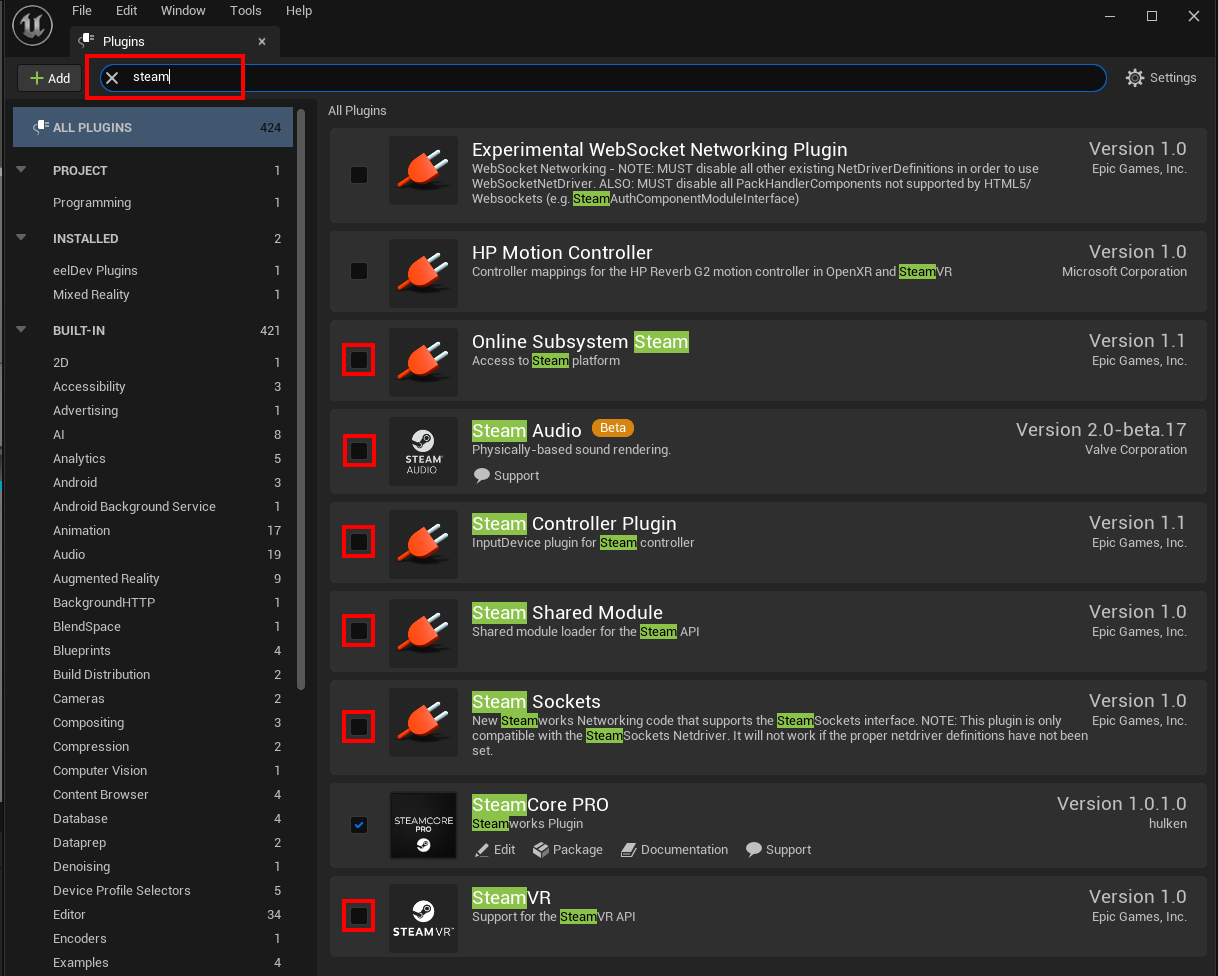
Step 1: Disable Engine Steam Plugins
Before proceeding, make sure to disable any built-in Steam-related plugins that come with the engine.
Step 2: Select Your Engine Version
Open the Epic Launcher and ensure you're selecting the correct version of Unreal Engine.
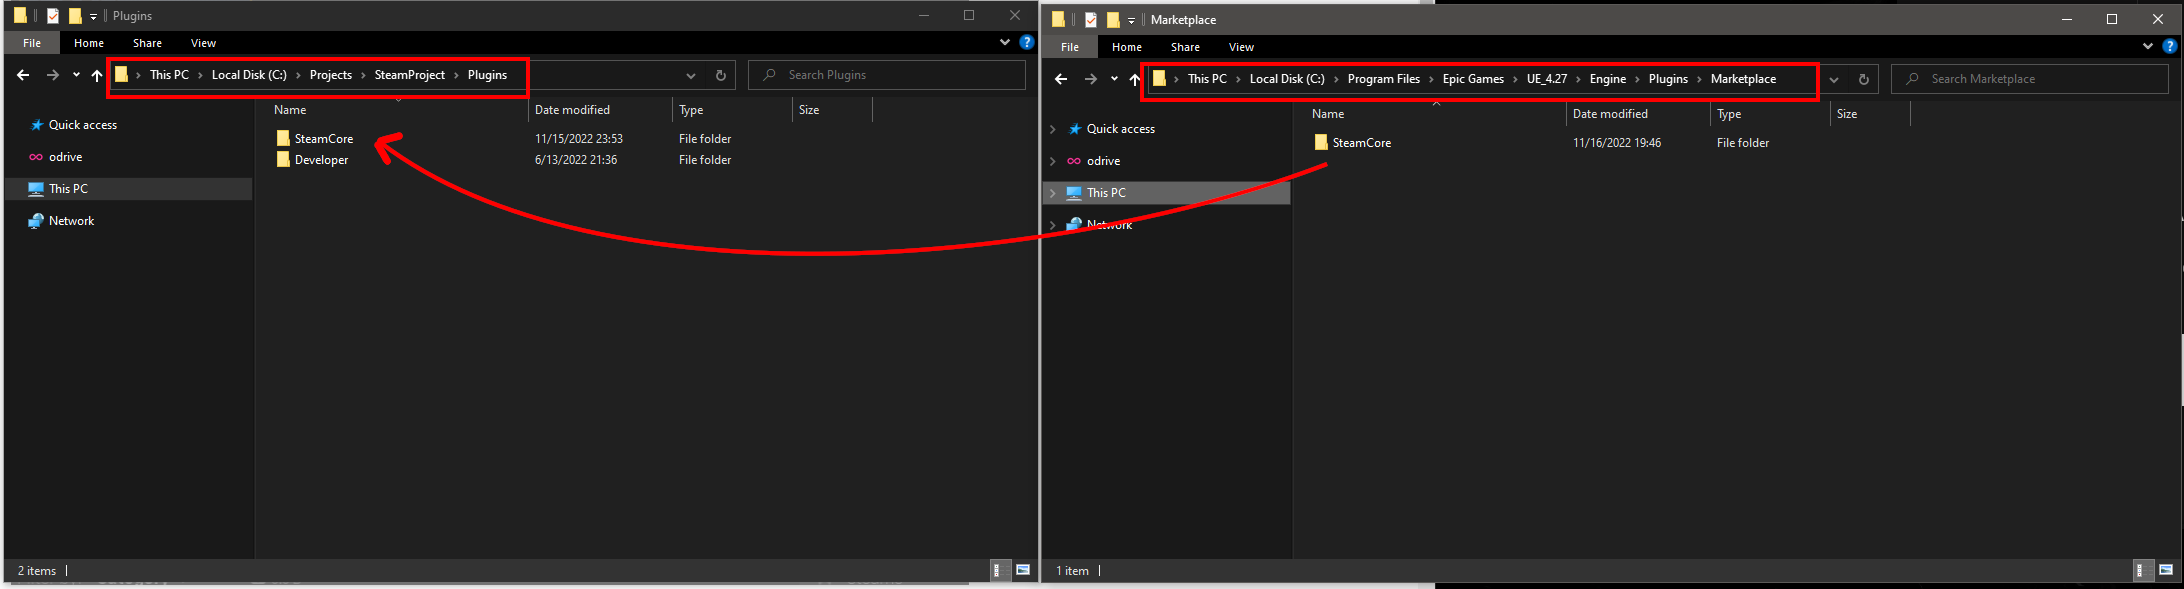
Step 3: Move the Plugin to Your Project
After installation, move (do not copy) the plugin from the engine’s Marketplace directory to your project’s Plugins folder.
If your project doesn't have a
Pluginsdirectory yet, you’ll need to create one.
Example Path: C:\Program Files\Epic Games\UE_4.27\Engine\Plugins\Marketplace
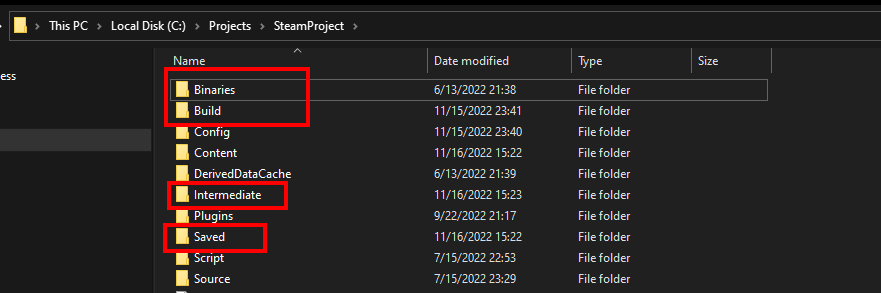
Step 4: (Optional) Force Plugin/Project Recompile
To ensure everything compiles cleanly, you can force a recompile by deleting the following folders from your project directory:
BinariesBuildIntermediateSaved
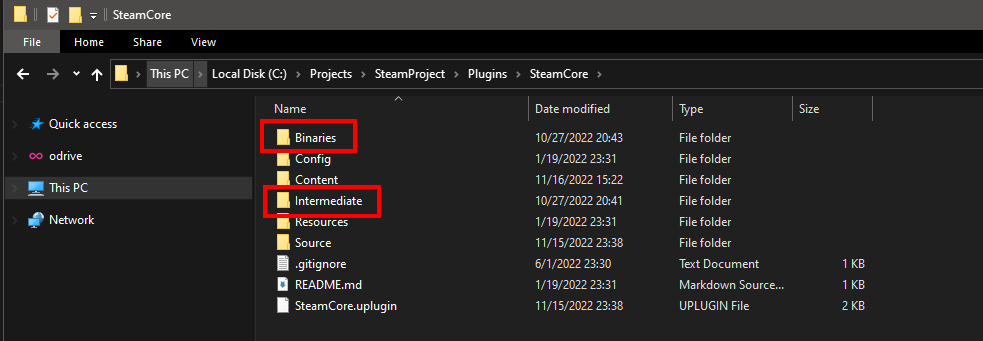
Also delete the following folders from the SteamCore plugin directory:
BinariesIntermediate
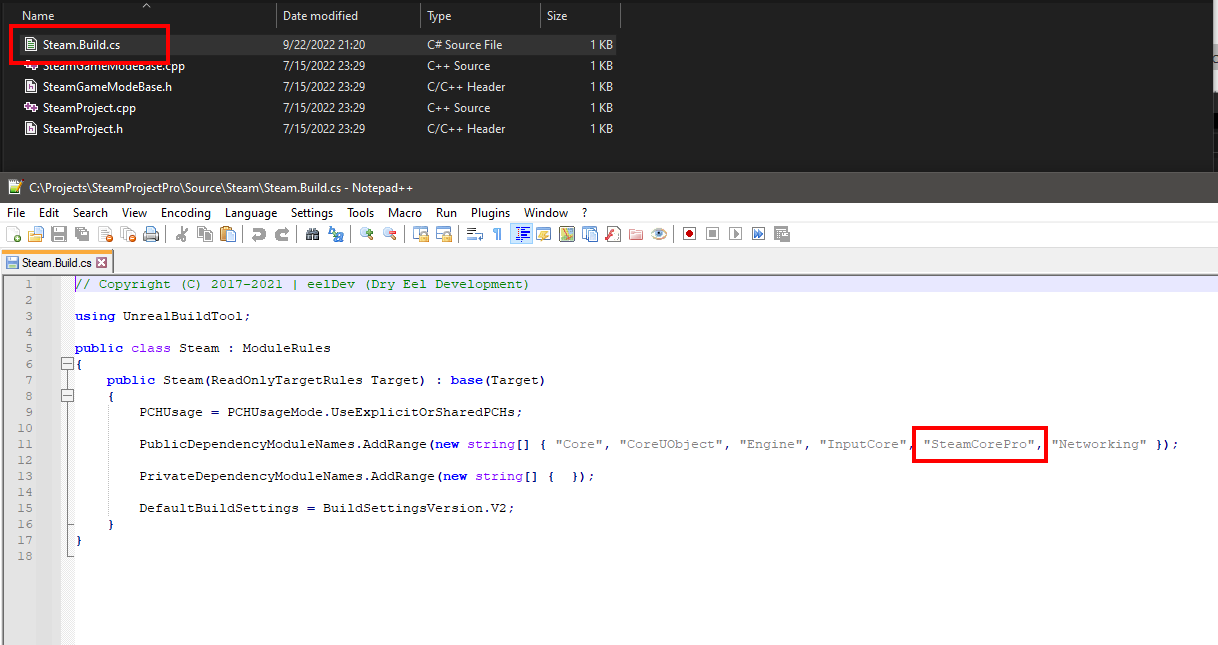
Step 5: C++ Project Setup
If you're working with a C++ project, add SteamCorePro as a module dependency in your project's Build.cs file.
Step 6: Enable the Plugin
Once moved and cleaned, enable the plugin from the Unreal Editor's Plugins menu.
