Testing Steam Functionality
This guide outlines important steps and requirements to ensure smooth testing of Steam integration in your Unreal Engine project.
Prerequisites for Testing
- Configure Steam settings properly in your
DefaultEngine.ini. See detailed configuration instructions here. - Ensure the Steam Client is running and that you are logged in.
- Verify that the Steam account used for testing owns the game. You can:
- Add the Steam account to your app’s organization, or
- Obtain Steam keys from Valve to activate the game on the tester’s account.
Testing a Packaged Build
- Always package your game as a Development Build for local testing.
- If packaging as a Shipping Build, you must upload the build to Steam and launch it via the Steam Client. (This behavior can now be turned off if you want to test shipping builds locally, see configuring plugin)
Packaging Using the Project Launcher
Multiplayer Testing
NOTE
You must use a Packaged game build to test multiplayer, testing in the editor is not going to work
- Multiplayer testing via Steam requires:
- Two separate computers, each logged into different Steam accounts, or
- One computer and a virtual machine (VM) setup.
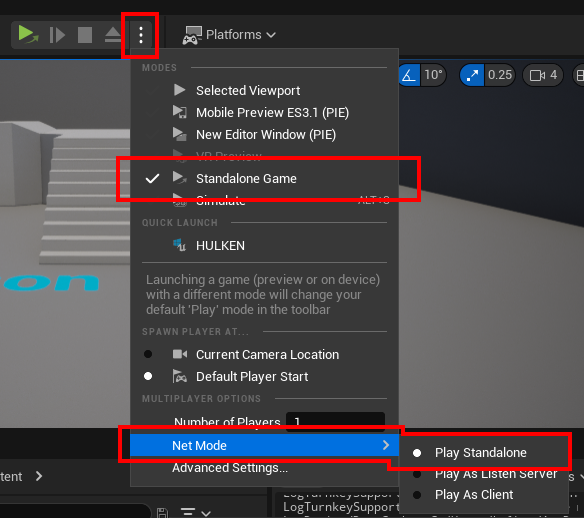
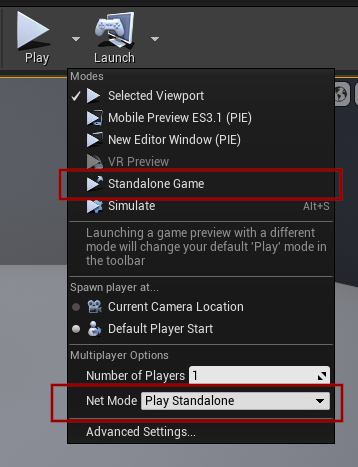
Testing in the Editor
To test Steam functionality within the Unreal Editor, launch a Standalone Game instance.
UE4
Launch a standalone instance to initialize Steam.
UE5
Launch a standalone instance to initialize Steam.