Microtransactions
This guide explains how to implement microtransactions in your Unreal Engine game using the SteamCore::Web plugin, which is required to enable this functionality. Players can purchase in-game items, such as weapons or cosmetics, through Steam's payment system.
The SteamCore::Web plugin is a separate purchase required to use microtransaction functionality. Ensure you have acquired and installed it from eelDev before proceeding.
Prerequisites
- SteamCore::Web plugin installed in your Unreal Engine project.
- A valid Steam App ID and Web API Key from Valve (see Steamworks Web API Documentation).
- Steamworks Inventory Service enabled for your application.
- Configured item definitions in Steamworks for purchasable items.
Configuring Plugin Settings
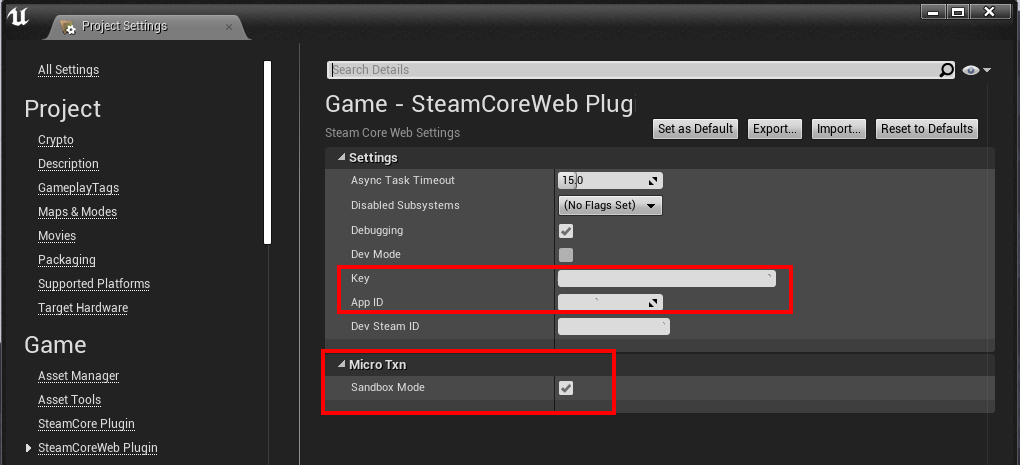
To enable microtransactions, configure the SteamCore::Web plugin settings in Unreal Engine.
- Open Project Settings > SteamCore::Web.
- Set your Web API Key obtained from Valve.
- Enable Sandbox Mode for the MicroTXN Interface to test transactions without real payments.
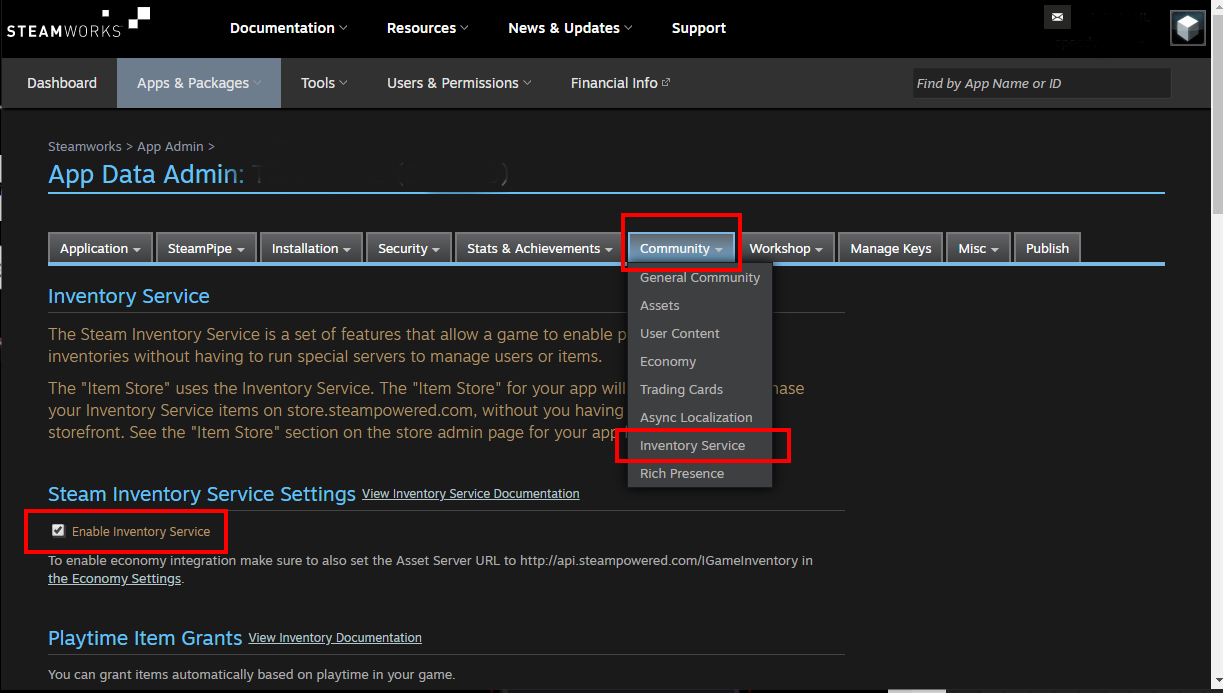
Setting Up Steamworks Inventory Service
Enable the Inventory Service in your Steamworks application settings to support microtransactions.
- Navigate to Steamworks Settings > Community > Inventory Service.
- Check Enable Inventory Service.
Defining Purchasable Items
Define the items players can purchase in your game using the Steamworks Inventory Service schema. See the Steamworks Inventory Schema Documentation for details.
Example Item Definition
Create a JSON schema for your items, specifying details like itemdefid, type, price, and more. Below is an example defining a "Drop Generator," "Hat Decoration," and "Red Hat."
{
  "appid": 480,
  "items": [
    {
      "itemdefid": 10,
      "type": "playtimegenerator",
      "bundle": "100x100;101x50;102x25;103x2;110x20;111x20;120x5;121x3",
      "name": "Drop Generator",
      "name_color": "7D6D00",
      "background_color": "3C352E",
      "item_slot": "generator",
      "item_quality": 0,
      "icon_url": "http://cdn.beta.steampowered.com/apps/440/icons/c_fireaxe_pyro_xmas_large.fa878752e1aa09a721a03042a234063b6c929278.png",
      "icon_url_large": "http://cdn.beta.steampowered.com/apps/440/icons/c_fireaxe_pyro_xmas_large.fa878752e1aa09a721a03042a234063b6c929278.png",
      "tradable": false,
      "marketable": false
    },
    {
      "itemdefid": 100,
      "type": "item",
      "name": "Hat Decoration",
      "description": "Hat decoration description",
      "price": "1;USD99",
      "name_color": "7D6D00",
      "background_color": "3C352E",
      "item_slot": "decoration",
      "item_quality": 0,
      "icon_url": "http://cdn.beta.steampowered.com/apps/440/icons/c_fireaxe_pyro_xmas_large.fa878752e1aa09a721a03042a234063b6c929278.png",
      "icon_url_large": "http://cdn.beta.steampowered.com/apps/440/icons/c_fireaxe_pyro_xmas_large.fa878752e1aa09a721a03042a234063b6c929278.png",
      "tradable": true,
      "marketable": true
    },
    {
      "itemdefid": 200,
      "type": "item",
      "price": "1;VLV100",
      "name_english": "Red Hat",
      "name_german": "Roter Hut",
      "description_english": "Red Hat",
      "description_german": "Roter Hut",
      "store_tags": "hat;featured",
      "icon_url": "http://cdn.beta.steampowered.com/apps/440/icons/c_fireaxe_pyro_xmas_large.fa878752e1aa09a721a03042a234063b6c929278.png",
      "icon_url_large": "http://cdn.beta.steampowered.com/apps/440/icons/c_fireaxe_pyro_xmas_large.fa878752e1aa09a721a03042a234063b6c929278.png",
      "tradable": true,
      "marketable": true
    }
  ]
}
Initiating a Transaction
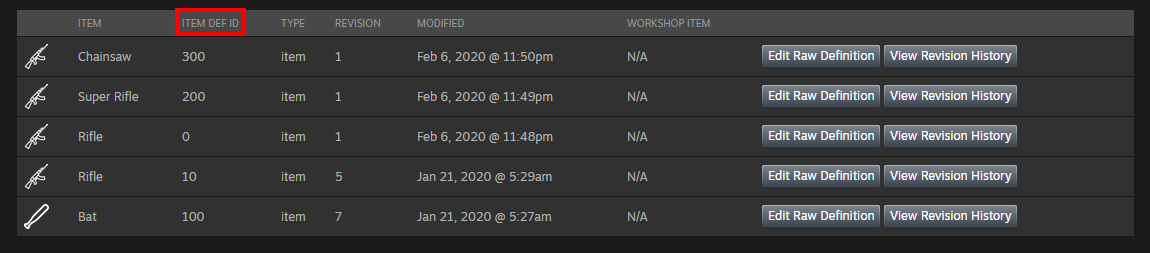
To start a purchase, use the Initiate Purchase node to trigger a transaction for specific items. For example, the following Blueprint initiates a purchase for a "Rifle" (ItemDefID: 10) and a "Bat" (ItemDefID: 100).

Steps
- Add the Initiate Purchase node to your game logic (e.g., in a UI Blueprint triggered by a "Buy" button).
- Specify the
ItemDefIDfor each item the player wants to purchase. - Execute the node to display the Steam Overlay with the transaction details.
Demo Video
Watch a short demo of purchasing a "Bat" item. For a complete example, download the Example Project from eelDev.
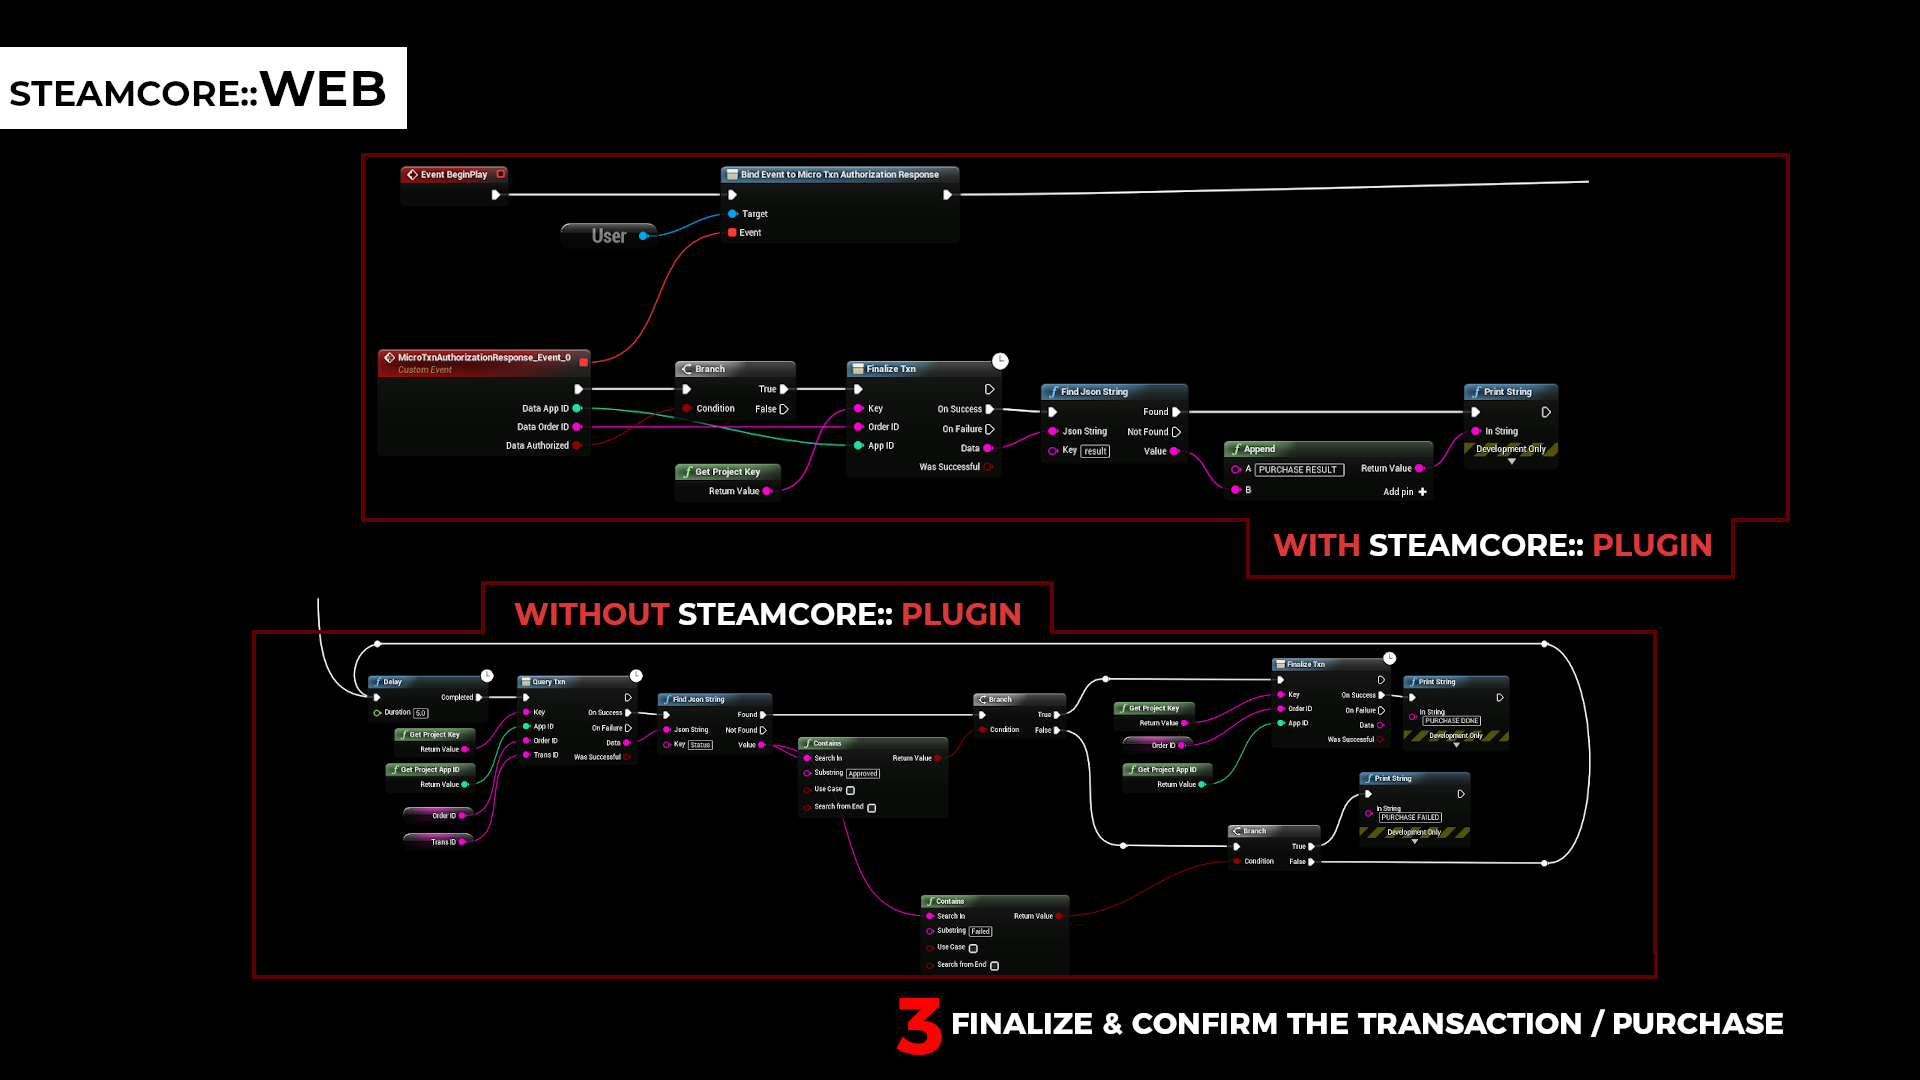
Finalizing a Transaction
After the player confirms the purchase via the Steam Overlay, finalize the transaction to complete the process and grant the items to the player. You can use the Finalize Purchase node provided by SteamCore::Web or implement custom logic.
Steps
- Listen for the MicroTxnAuthorizationResponse event to detect when the player authorizes or denies the transaction.
- If authorized, add the Finalize Purchase node and pass the
OrderIDfrom the authorization event. - Grant the purchased items to the player (e.g., update inventory or unlock content).
- Handle denial cases by informing the player (e.g., via a UI message).
Notes
- Sandbox Mode: Always enable Sandbox Mode during testing to avoid real charges. Disable it for production.
- Security: Use the GetReliableUserInfo endpoint to verify the Steam user’s reliability before initiating transactions to prevent fraud.
- Error Handling: Implement logic to handle transaction failures, such as insufficient funds or Steam Overlay issues, and provide clear feedback to players.
- Localization: Support multiple languages in item definitions (e.g.,
name_english,name_german) for a global audience. - Testing: Test transactions thoroughly in Sandbox Mode to ensure proper integration with Steam’s Inventory Service.